DIY Fabric Flowers: The Ultimate Guide [Step-by-Step]

Discover the captivating world of flores de tela, a delightful craft accessible to everyone! Creativity takes center stage as we delve into the art of transforming simple materials into stunning floral creations. This guide provides step-by-step instructions, ensuring even beginners can master the techniques. You'll learn to utilize your favorite fabric scraps to replicate the beauty of nature, one petal at a time. So, gather your supplies, and let's embark on a journey to create beautiful and personalized flores de tela, adding a touch of handmade charm to your world. Learning to make DIY flores de tela involves mastering different sewing techniques that we'll guide you through in this article.
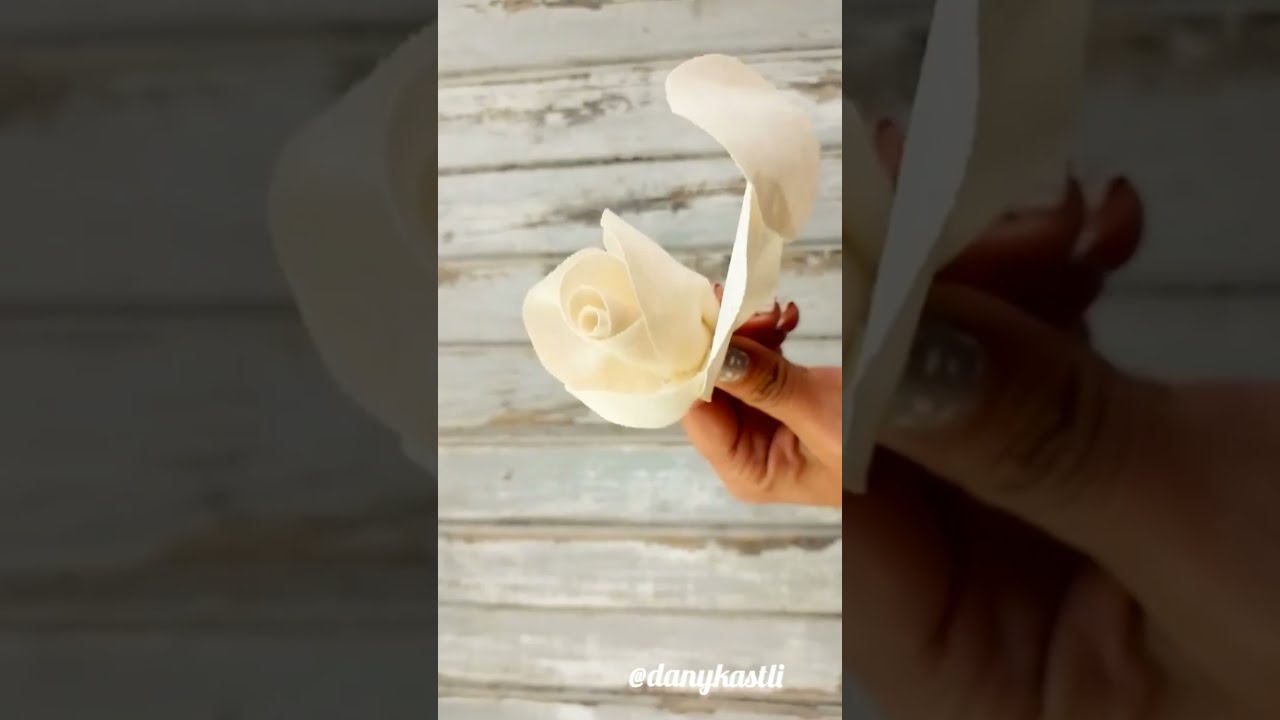
Image taken from the YouTube channel Dany Kastli , from the video titled Easy & Beautiful Fabric Flowers: A DIY Craft Project for Beginners🌸" #diy .
Have you ever paused to admire the intricate beauty of a flower? Now, imagine recreating that beauty with your own hands, using nothing more than fabric, thread, and a dash of creativity.
The art of crafting fabric flowers opens up a world of possibilities, allowing you to create everlasting blooms in a myriad of colors, textures, and styles.
This guide will walk you through the fundamentals of this rewarding craft.
We'll explore not only the English DIY instructions but also touch upon the Spanish translation, "flores de tela," opening up this creative pursuit to a broader audience.
The Joy of Handmade Blooms
There's a unique satisfaction in creating something beautiful with your own two hands.
Fabric flower making is no exception.
Transforming simple pieces of fabric into intricate floral designs is a deeply rewarding experience.
It's a chance to slow down, engage your creativity, and produce something truly special.
A Universe of Fabrics, Styles, and Applications
The beauty of fabric flowers lies in their versatility.
From the delicate sheen of silk to the rustic charm of burlap, the choice of fabric dramatically impacts the final aesthetic.
Imagine crafting elegant roses from satin, cheerful daisies from cotton, or even whimsical sunflowers from felt.
The styles are just as varied, ranging from classic rose designs to modern, abstract creations.
The applications are equally boundless. Fabric flowers can adorn hair accessories, embellish clothing, enhance home decor, and add a personal touch to gifts.
Crafting for Every Skill Level
Whether you're a seasoned crafter or a complete beginner, the world of fabric flower making has something to offer.
Simple flower designs are perfect for those just starting out, while more complex techniques can challenge even the most experienced artisans.
This guide aims to provide clear, concise instructions that can be adapted to any skill level.
A Sneak Peek into the Creative Process
Get ready to embark on a creative journey.
In the following sections, we'll delve into the essential tools and materials, explore the nuances of fabric selection, and master fundamental techniques.
We'll also present a step-by-step guide to crafting a classic fabric rose, your first foray into the world of "flores de tela". So, gather your supplies, unleash your imagination, and prepare to be amazed by the beauty you can create.
Have you ever paused to admire the intricate beauty of a flower? Now, imagine recreating that beauty with your own hands, using nothing more than fabric, thread, and a dash of creativity. The art of crafting fabric flowers opens up a world of possibilities, allowing you to create everlasting blooms in a myriad of colors, textures, and styles. This guide will walk you through the fundamentals of this rewarding craft. We'll explore not only the English DIY instructions but also touch upon the Spanish translation, "flores de tela," opening up this creative pursuit to a broader audience. The joy of handmade blooms offers a unique satisfaction in creating something beautiful with your own two hands, no exception to fabric flower making. Transforming simple pieces of fabric into intricate floral designs is a deeply rewarding experience. It's a chance to slow down, engage your creativity, and produce something truly special. The beauty of fabric flowers lies in their versatility. From the delicate sheen of silk to the rustic charm of burlap, the choice of fabric dramatically impacts the final aesthetic. Imagine crafting elegant roses from satin, cheerful daisies from cotton, or even whimsical sunflowers from felt. The styles are just as varied, ranging from classic rose designs to modern, abstract creations. The applications are equally boundless. Fabric flowers can adorn hair accessories, embellish clothing, enhance home decor, and add a personal touch to gifts. Whether you're a seasoned crafter, ready to embark on your next project, or are a curious beginner, about to take your first steps into this delightful world, the journey begins with preparation.
Gather Your Supplies: Essential Tools and Materials for Fabric Flowers
Like any artistic endeavor, creating stunning flores de tela requires having the right tools and materials at your fingertips. Careful preparation ensures a smoother, more enjoyable crafting experience. This section will meticulously detail the essential items you’ll need, from the fundamental cutting tools to the delightful embellishments that add character to your floral creations.
Essential Tools: Your Crafting Arsenal
Every artist needs their trusted tools, and fabric flower making is no different. These are the implements that will shape and mold your materials into breathtaking floral art.
-
Scissors: A sharp pair of regular scissors is indispensable for general cutting tasks. Investing in a pair of pinking shears is also highly recommended. Their zig-zag edge prevents fraying and adds a decorative touch to your petals.
-
Hot Glue Gun and Glue Sticks: The hot glue gun is your best friend for quickly and securely bonding fabric pieces together. Ensure you have an ample supply of glue sticks to avoid interruptions during your creative flow.
-
Fabric Glue (Optional): While a hot glue gun is fantastic for many applications, fabric glue offers a gentler alternative, especially when working with delicate materials like silk or chiffon. It prevents scorching and provides a more subtle bond.
-
Needle and Thread: Sometimes, a personal touch is required. A needle and thread are essential for hand-sewing petals, adding intricate details, and securing elements that require a more delicate approach than glue alone. Embroidery floss can also be used.
-
Wire Cutters: Floral wire forms the backbone of many fabric flowers, providing structure and support for stems and petals. Wire cutters are necessary to cleanly cut the wire to the desired length, making it easy to shape.
Essential Materials: The Building Blocks of Beauty
With your tools assembled, it's time to gather the core materials that will form the very essence of your flores de tela.
-
Various Fabrics: The beauty of fabric flowers lies in the vast array of materials you can use. Consider building a collection of different textures and weights.
- Cotton is a versatile and affordable option, ideal for structured roses or daisies.
- Silk exudes elegance and delicacy, perfect for crafting lifelike peonies.
- Felt is sturdy and easy to work with, making it ideal for beginners and simpler flower designs.
- Burlap adds a rustic charm, great for sunflowers or country-style flower arrangements.
- Satin lends a luxurious sheen to carnations and other formal blooms.
- Chiffon creates ethereal, flowing petals for delicate poppies.
- Linen is another great fabric with great texture.
-
Templates: Consistent petal shapes are key to creating professional-looking flowers. Templates, whether printable or self-made from cardboard or plastic, will guide your cutting and ensure uniformity.
-
Buttons, Beads, and Other Embellishments: These are the jewels that elevate your fabric flowers from simple crafts to stunning works of art. Buttons, beads, sequins, and other embellishments add sparkle, texture, and personality to the center of your flowers or along the edges of petals.
-
Wire (Floral Wire): Floral wire provides the necessary support for stems and petals, allowing you to shape and arrange your flowers with ease. Choose a gauge appropriate for the size and weight of your flowers.
-
Floral Tape: Floral tape is used to wrap wire stems, creating a natural and seamless look. It also provides a slightly tacky surface, which helps to secure petals and leaves to the stem.
Material Alternatives: Embrace Resourcefulness
Creativity thrives on resourcefulness. If you're missing a specific material, don't let that stop you.
Consider these alternatives:
- Craft Foam: If you don't have felt, craft foam can be used for certain projects.
- Ribbons: Excess fabric ribbons can be used to add volume to flowers.
By gathering your essential tools and materials and exploring creative alternatives, you'll be well-equipped to embark on your fabric flower-making journey. Remember, this is just the beginning. As you gain experience, you'll discover your own favorite tools, materials, and techniques that will help you create truly unique and breathtaking flores de tela.
Have you selected your tools and gathered your materials? Then you're already one step closer to your flower making experience. Now, let's dive into the crucial world of fabric selection. The fabric you choose is more than just a material; it’s the very soul of your floral creation, the determinant of its character and charm.
Fabric Selection: Choosing the Right Material for Your Flower Style
The impact of fabric choice on your flores de tela cannot be overstated. It dictates everything from the flower's texture and drape to its overall aesthetic and durability. Think of it as selecting the right paint for a masterpiece – the medium is as important as the artist's vision.
The Influence of Fabric Type
Each fabric possesses unique qualities that lend themselves to different flower styles. The weight, weave, and fiber content of the fabric will drastically alter the final product.
Consider the delicate sheen of silk versus the rustic texture of burlap. One whispers elegance, while the other speaks of countryside charm. Understanding these nuances is key to achieving the desired effect.
Fabrics Suited for Specific Flower Types
Here's a closer look at some popular fabric choices and the flower styles they best complement:
Cotton: Versatility in Bloom
Cotton is a fantastic all-around choice, especially for beginners. Its structured nature makes it ideal for creating roses with defined petals, cheerful daisies, or any flower where shape and form are important.
It is relatively inexpensive, easy to handle, and available in a vast array of colors and prints.
Silk: The Epitome of Elegance
For flowers that exude sophistication and grace, silk is the ultimate choice. Its delicate drape and subtle sheen make it perfect for crafting exquisite peonies, delicate orchids, or any bloom where a touch of luxury is desired.
Because of its higher cost and slippery nature, it is best suited for intermediate to advanced crafters.
Felt: Sturdy and Simple
Felt is a fantastic choice for beginners. Its easy to cut and glue, its ideal for simpler flower designs.
Felt flowers have a unique charm, offering a cozy, handmade feel. It is excellent for children's crafts and quick projects.
Burlap: Rustic Beauty
If you're aiming for a country-chic or farmhouse aesthetic, burlap is your go-to fabric. Its coarse texture and earthy tones lend themselves beautifully to sunflowers, wildflowers, and other rustic-style blooms.
Burlap flowers add a touch of homespun charm to any project.
Satin: A Touch of Luxury
Satin's smooth texture and luminous sheen bring a touch of glamour to any fabric flower. It is particularly well-suited for crafting carnations, elegant roses, and other blooms where a luxurious feel is desired.
Satin captures light beautifully, adding depth and dimension to your creations.
Don't Be Afraid to Experiment
While these suggestions provide a helpful starting point, the true magic happens when you dare to experiment. Don't be afraid to mix and match fabrics, explore unconventional materials, and push the boundaries of your creativity.
The world of fabric flowers is vast and full of possibilities. Who knows? You might just discover your new favorite combination.
The right fabric will undoubtedly set the stage, but it’s the mastery of fundamental techniques that truly breathes life into your fabric flower creations. These techniques, while seemingly simple individually, unlock a world of possibilities when combined. Think of them as the notes in a musical scale; each one distinct, but together, they create beautiful harmonies.
Techniques: Mastering the Fundamental Skills
At the heart of every stunning fabric flower lies a set of core techniques. These aren't just steps to follow; they're skills to hone, allowing you to translate your vision into a tangible work of art.
Precision Cutting: The Foundation of Form
Cutting is the first point of contact between you and your chosen fabric, and accuracy here is paramount.
The Template's Role
Templates, whether printable or self-made, are your best friends for achieving precise and consistent petal shapes. Trace them carefully onto your fabric using a fabric marker or tailor's chalk before cutting.
Beyond the Straight Cut
Don't limit yourself to simple, straight cuts. Experiment with different cutting tools and techniques to add unique character to your flowers.
Pinking shears, for example, create a delightfully frayed edge, perfect for adding a touch of whimsy or a rustic feel.
Stitching Secrets: Adding Strength and Dimension
Sewing provides a way to not only hold your flower together securely, but also to create unique textures.
The Gathering Stitch
The humble running stitch, when gathered, becomes a powerful tool for creating ruffles and volume. Simply sew a line of running stitches along the base of your petal and gently pull the thread to gather the fabric.
Dimensional Stitching
Consider using embroidery floss to add veins or other decorative details to your petals. These small touches can elevate your flowers from simple craft projects to realistic works of art.
Gluing: The Quick and Secure Bond
Gluing is an indispensable technique, especially for projects where speed and convenience are key.
Hot Glue Mastery
The hot glue gun is your go-to for quick and secure bonds. Apply glue sparingly to avoid unsightly blobs.
Always use a heat-resistant surface to protect your work area and exercise caution to avoid burns.
The Gentle Touch of Fabric Glue
For delicate fabrics like silk or chiffon, fabric glue is a gentler alternative. Apply a thin, even layer to avoid saturation and discoloration.
The Art of Rolling: Creating the Heart of the Flower
Rolling is essential for forming the tight, intricate centers of flowers like roses.
Start with a small petal and roll it tightly to form the bud. Then, gradually add more petals, overlapping them slightly as you roll.
The tighter the roll, the smaller and more compact the center will be.
Gathering for Graceful Volume
Gathering involves creating soft folds or ruffles in your fabric, adding dimension and visual interest to your flower. Run a simple stitch along the base of the fabric and gently pull the thread to create the desired fullness.
Experiment with different stitch lengths and thread tensions to achieve varying degrees of gathering.
Folding Finesse: Sculpting Unique Petals
Folding techniques allow you to manipulate fabric into unique petal shapes.
Try folding petals in half or creating pleats to add depth and texture.
Origami techniques can also be adapted for fabric to create stunning geometric designs.
Ironing: Setting the Stage with Heat
Heat is a powerful tool for shaping and setting fabric petals. Use an iron to create curves, creases, and other desired effects.
Be sure to use the appropriate heat setting for your fabric to avoid scorching or melting.
The Final Touch: Shaping for Realism
Shaping is the final step in bringing your fabric flower to life.
Gently manipulate the petals with your fingers to create realistic curves and contours.
Bend and curl the edges to add a touch of natural asymmetry. This is where your artistic eye truly shines.
The fabric we choose sets the stage and the techniques provide the method, but now we can bring all of our preparations to life with a classic project: the fabric rose. "Flores de tela," as it's known in Spanish, offers endless opportunities for beauty and the rose is where many crafters begin.
Step-by-Step Guide: Crafting a Classic Rose from Fabric (Flores de Tela)
This detailed tutorial will guide you through the creation of a timeless fabric rose. Each step is designed to be clear and manageable, transforming simple fabric into a beautiful floral creation. This rose is perfect for adding a touch of elegance to any project, from home décor to personalized gifts. Let's begin!
Step 1: Cut Out Petal Shapes from Fabric
The foundation of any fabric flower lies in the precise cutting of its petals.
First, acquire a template. You can find printable templates online, create your own, or even use pre-cut shapes if you're looking for maximum convenience.
Trace the template onto your chosen fabric using a fabric marker or tailor's chalk. Accuracy here is crucial for achieving a symmetrical and professional-looking rose.
Cut out several petal shapes in varying sizes to add depth and realism to your flower. Consider cutting at least five small, five medium, and five large petals.
Remember: "Flores de tela" translates to "fabric flowers" in Spanish.
Step 2: Shape the Petals
Give your petals dimension and character by shaping them.
You can use heat to shape the petals: Gently run the edge of each petal over a warm iron. This will cause the fabric to curl slightly, creating a more natural look. Be careful not to burn the fabric!
For a more organic approach, shape the petals by hand. Gently stretch and manipulate the fabric to create curves and folds.
Experiment with both methods to find what works best for you and your chosen fabric.
This step adds a layer of realism that separates a handcrafted rose from a mass-produced one.
Step 3: Form the Bud
The heart of the rose is its tightly rolled center.
Take one of the smallest petals and begin rolling it tightly. This will form the bud of your rose.
Secure the rolled petal with a dab of hot glue or a few stitches to prevent it from unraveling. A well-formed bud is essential for a beautiful finished product.
This bud sets the tone for the entire rose, so take your time and ensure it's secure and aesthetically pleasing.
Step 4: Add Subsequent Petals
With the bud in place, begin adding the remaining petals.
Apply a small amount of hot glue or fabric glue to the base of each petal.
Attach each petal around the bud, slightly overlapping the previous one. This overlapping technique creates the layered effect characteristic of a rose.
Consider using a running stitch with thread to fix the petals in place.
As you add petals, vary their placement and angle to create a more natural and dynamic look.
Step 5: Build Fullness
Continue adding petals, alternating between small, medium, and large sizes.
Adjust the placement and angle of each petal to achieve the desired size and fullness.
Don't be afraid to experiment with different arrangements until you're satisfied with the overall look of the rose.
This is where your artistic vision comes into play; use your creativity to craft a rose that reflects your unique style.
Step 6: Secure the Base
Once the rose has reached your desired size and fullness, secure the base.
Apply a generous amount of hot glue or stitch the petals together at the base.
This will prevent the rose from falling apart and ensure that it maintains its shape over time. A well-secured base is crucial for a long-lasting flower.
Reinforce the base with additional glue or stitches as needed.
Step 7: Add a Stem (Optional)
To transform your fabric rose into a standalone flower, add a stem.
Cut a length of floral wire using wire cutters.
Attach the wire to the base of the rose using hot glue or floral tape.
Wrap the wire with floral tape to create a more realistic and comfortable stem. A stem adds versatility to your fabric flower, allowing you to use it in bouquets, arrangements, and other displays.
Alternatively, you can leave the rose stemless for use in embellishments or other craft projects.
Congratulations! You have now crafted your very own classic fabric rose, or "flor de tela," using simple techniques and materials. Experiment with different fabrics, colors, and sizes to create a variety of unique and beautiful roses.
Remember, the Spanish translation for this guide is: "Esta es una guía paso a paso para hacer una rosa de tela."
The fabric we choose sets the stage and the techniques provide the method, but now we can bring all of our preparations to life with a classic project: the fabric rose. "Flores de tela," as it's known in Spanish, offers endless opportunities for beauty and the rose is where many crafters begin.
Flower Style Inspiration: Exploring Different Designs
Once you've mastered the basic techniques, the world of fabric flowers truly blossoms. Don't limit yourself to just roses! There's an entire garden of designs waiting to be explored, each with its unique charm and character.
Let's venture beyond the classic rose and discover some inspiring flower styles, from the delicate peony to the rustic sunflower. Here are some ideas to get you started.
The Luxurious Peony
The peony, with its full, lush bloom, exudes elegance and opulence. For a truly stunning peony, consider using silk or satin. These fabrics drape beautifully and capture the flower's delicate texture perfectly.
Experiment with layering different shades of pink and cream to create depth and realism. A tightly gathered center and cascading outer petals are key to achieving the peony's signature look.
The Rustic Sunflower
For a touch of rustic charm, look no further than the sunflower. Burlap and felt are excellent choices for crafting these cheerful blooms. The coarse texture of burlap adds a wonderfully earthy feel, while felt provides structure and stability.
Don't be afraid to mix and match different shades of yellow and brown to capture the sunflower's characteristic warmth. Consider adding a button or bead center for added detail.
The Cheerful Daisy
Simple and cheerful, the daisy is a delightful addition to any fabric flower collection. Cotton or felt are ideal for creating these classic blooms. Their easy-to-work-with nature makes them perfect for beginner crafters.
Cut out rounded petals and arrange them around a bright yellow center for an instantly recognizable daisy. You can vary the size and shape of the petals for a more whimsical look.
The Flowing Poppy
The poppy, with its delicate petals and vibrant colors, evokes a sense of freedom and whimsy. Delicate fabrics like chiffon or crepe are perfect for capturing the poppy's flowing form.
The lightweight nature of these fabrics allows the petals to move and sway gently, creating a truly lifelike effect. Consider using wire to shape the petals and add a touch of structure.
The Textured Carnation
With its ruffled petals and rich texture, the carnation adds a touch of sophistication to any project. Satin or velvet are excellent choices for crafting these unique blooms.
The subtle sheen of satin and the plush feel of velvet enhance the carnation's luxurious appeal. Experiment with different shades of pink, red, and white to create a variety of stunning carnations.
Finding Inspiration in Nature
The best inspiration often comes from the natural world. Take a walk through a garden, visit a botanical garden, or simply browse through botanical illustrations online.
Pay attention to the shapes, colors, and textures of different flowers. Consider how you can translate these elements into your own fabric flower creations. Don't be afraid to experiment and let your creativity blossom!
The fabric we choose sets the stage and the techniques provide the method, but now we can bring all of our preparations to life with a classic project: the fabric rose. "Flores de tela," as it's known in Spanish, offers endless opportunities for beauty and the rose is where many crafters begin.
Applications: Unleashing the Versatility of Fabric Flowers
Once you’ve poured your heart into crafting beautiful flores de tela, the next delightful question is: how will you use them? The possibilities are as boundless as your imagination.
From adding a touch of whimsical charm to your everyday outfits to creating unforgettable decorations for special occasions, fabric flowers offer a uniquely personal way to express your style and creativity. Let’s explore some of the most inspiring and rewarding applications of these handcrafted treasures.
Adorning Yourself: Fabric Flowers as Fashion Statements
Fabric flowers are more than just crafts; they're wearable art. They can transform everyday accessories into personalized statements, adding a touch of elegance and individuality to your look.
Hair Accessories: A Floral Crown
Imagine a delicate headband blooming with miniature roses, or a simple barrette transformed into a vibrant garden with carefully arranged petals. Fabric flowers can elevate any hairstyle, from casual to formal.
Consider crafting clips adorned with miniature daisies for a playful touch, or an elegant headpiece featuring silk peonies for a special occasion. The key is to choose colors and styles that complement your personal aesthetic.
Brooches: A Touch of Floral Elegance
A fabric flower brooch is a classic accessory that can instantly elevate any outfit. Pin a vibrant sunflower to your lapel for a touch of rustic charm, or adorn a simple dress with a sophisticated satin rose.
Experiment with different fabrics and embellishments to create brooches that reflect your unique style. A brooch can be a conversation starter, a subtle expression of your personality, or simply a beautiful focal point for your attire.
Enhancing Your Home: Bringing the Garden Indoors
Fabric flowers aren't limited to personal adornment; they can also breathe life and beauty into your home decor.
Bouquets, Wreaths, and Garlands: Evergreen Beauty
Unlike real flowers, fabric flowers offer lasting beauty without the need for watering or maintenance. Create a stunning bouquet of fabric roses for your dining table, or craft a whimsical wreath of felt daisies to welcome guests to your home.
A garland of fabric flowers can add a touch of romance to any room, draping gracefully over a mantelpiece or window frame. Choose colors and styles that complement your existing decor, creating a cohesive and inviting atmosphere.
Celebrating Special Moments: Fabric Flowers for Weddings and Gifts
Fabric flowers add a personal touch to life’s most cherished occasions. They offer a lasting reminder of the joy and beauty of the moment.
Wedding Decor: A Bloom That Lasts
Imagine centerpieces overflowing with handcrafted fabric flowers, bouquets that will last a lifetime, and wedding favors adorned with delicate floral accents. Fabric flowers can transform a wedding into a truly unforgettable celebration.
They allow for customization beyond what fresh flowers can offer, matching color schemes perfectly and offering unique textures. They also serve as memorable keepsakes for the bride, bridesmaids, and guests.
Gift Embellishments: A Touch of Handmade Love
Elevate your gift-giving by adding a handmade fabric flower to the wrapping. A single, carefully crafted rose can transform a simple gift box into a treasured keepsake.
Use different fabrics and colors to match the recipient's personality and the occasion. A fabric flower embellishment shows that you put extra thought and care into your gift, making it even more special.
Personalizing Your Wardrobe: Fabric Flowers as Appliqués
Take your clothing to the next level by adding fabric flower appliqués. This creative technique allows you to personalize garments and add unique designs.
Whether you embellish a denim jacket with a scattering of felt flowers or add a single, bold bloom to a simple t-shirt, fabric flower appliqués are a fantastic way to express your individual style. They're especially useful for covering up minor imperfections or adding a touch of whimsy to store-bought items.
The fabric we choose sets the stage and the techniques provide the method, but now we can bring all of our preparations to life with a classic project: the fabric rose. "Flores de tela," as it's known in Spanish, offers endless opportunities for beauty and the rose is where many crafters begin.
But before diving deeper into the crafting process and letting our creativity run wild, it’s crucial to pause and address an often-overlooked aspect of DIY projects: safety. Crafting should be a joyful and fulfilling experience, and that starts with understanding how to use our tools and materials responsibly.
Safety Considerations: Crafting Responsibly
Creating beautiful flores de tela is an enjoyable and rewarding process, but it’s vital to prioritize safety while you work. Paying close attention to safe practices will ensure a fun, injury-free crafting experience.
From wielding hot glue guns to handling sharp scissors, awareness and caution are key. Let’s examine some essential safety considerations to keep in mind as you bring your fabric flower visions to life.
Hot Glue Gun Safety: Avoiding Burns and Mishaps
The hot glue gun is an indispensable tool for fabric flower making, providing a quick and strong bond for petals and embellishments. However, its high temperature presents a potential burn hazard if not handled correctly.
Always use a heat-resistant surface such as a silicone mat or a piece of cardboard beneath your work area. This will protect your table or desk from accidental glue drips and heat damage.
Exercise extreme caution to avoid burns. The glue itself is very hot, and the nozzle of the gun can also cause burns if touched. If you do get glue on your skin, immediately run it under cold water.
Keep the glue gun out of reach of children and pets. Never leave a hot glue gun unattended, especially if there are young children or animals nearby. Unplug the gun when it's not in use. A glue gun stand can also help prevent accidents.
When applying glue, work deliberately and avoid distractions. A steady hand and focused attention can prevent misapplications and potential burns.
Sharp Object Handling: Scissors, Needles, and Pins
Sharp objects like scissors, needles, and pins are essential for cutting fabric, sewing petals, and adding details to your fabric flowers. But these tools also require careful handling to prevent cuts and punctures.
Use sharp scissors with caution, keeping your fingers clear of the blades. When not in use, store scissors in a safe place, such as a drawer or a scissor holder. Replace dull scissors immediately.
Store needles and pins safely in a pincushion or a closed container when you're not actively using them. Never leave needles or pins lying around on your work surface or on the floor where someone could accidentally step on them.
Consider using a magnetic pin holder. They are a great way to keep pins organized and prevent them from getting lost.
When sewing, use a thimble to protect your fingertips from needle pricks. If you do accidentally prick yourself, clean the wound thoroughly with soap and water.
By following these simple safety precautions, you can create beautiful fabric flowers without putting yourself or others at risk. Remember that a safe crafting environment is a happy crafting environment!
Video: DIY Fabric Flowers: The Ultimate Guide [Step-by-Step]

DIY Fabric Flowers: Frequently Asked Questions
Here are some common questions about making your own fabric flowers, also known as flores de tela. We hope this helps clarify the process and inspires your creativity!
What type of fabric works best for DIY fabric flowers?
Generally, lightweight to medium-weight fabrics are ideal. Cotton, silk, felt, and linen are popular choices. Stiffer fabrics like canvas may be harder to work with for delicate petals, but can be used for structural elements. Remember that the best fabric depends on the desired look and feel of your flores de tela.
How do I prevent the fabric edges from fraying?
There are several options. You can use pinking shears to create a zig-zag edge that minimizes fraying. Applying a fabric sealant, such as Fray Check, is another effective method. A quick pass with a lighter (carefully!) can also melt the edges, but this works best with synthetic fabrics.
What kind of glue is recommended for assembling fabric flowers?
Hot glue is a quick and easy option for assembling most fabric flowers. However, fabric glue is also suitable and dries clear. It's best to test a small area first to ensure the glue doesn't bleed through the fabric.
Can I dye my fabric to create custom-colored flores de tela?
Absolutely! Dyeing fabric is a great way to achieve unique colors. Fiber reactive dyes are recommended for natural fibers like cotton and linen. Follow the dye manufacturer's instructions carefully for the best results and to avoid uneven color.